
Homeownership carries a quiet, ongoing weight that most buyers rarely calculate before taking the keys. In those early months, everything feels crisp and sturdy. Yet behind every quiet wall and beneath every floorboard, mechanical components degrade, sealants shrink, and water relentlessly seeks the path of least resistance. Left unchecked, small maintenance gaps quietly compound until a sudden breakdown turns a quiet weekend into an expensive emergency.
The fundamental mistake most homeowners make is relying on a reactive approach. Waiting for something to make a strange noise, overflow, or fail completely turns routine home care into a series of high-stress fires. A far more effective and affordable strategy is establishing a systematic, seasonal maintenance routine. By breaking down your home’s upkeep into targeted quarterly tasks, you eliminate the guesswork, protect your property value, and keep minor wear from becoming major financial stress. The following guide walks you through building a proactive maintenance framework tailored to your house.
Step 1: Executing a Comprehensive Whole-House Baseline Audit

Before you can create a reliable seasonal calendar, you must establish an accurate baseline of your home’s current condition. Think of this initial audit as a comprehensive physical exam for your property. Grab a notebook or open a digital note app, flashlight in hand, and plan to spend half a day systematically examining your home from the ground up.
Inspecting the Exterior Shell and Attic Vulnerabilities
Start outside by walking the perimeter of your house on a bright day. Examine the siding, exterior trim, and window flashing for signs of rot, cracked caulk, or peeling paint. Look closely at where different materials meet, such as brick joining wooden trim, as these joints are prime entry points for moisture.
Next, conduct a ground-level inspection of your roof line. You do not necessarily need to climb onto the roof surface yourself, but you should look for missing shingles, lifted flashing around chimneys, or sagging gutters using a strong pair of binoculars. If you notice widespread granule loss on asphalt shingles or uneven lines along the ridge, scheduling a consultation with a qualified roofer gives you an accurate assessment of the remaining lifespan before minor leaks compromise your roof deck or attic insulation.
After examining the exterior, head up into the attic. Look for water staining on the underside of the roof sheathing, dark spots around vent pipes, or compressed insulation. A quick visit to the attic during a heavy rainstorm can reveal slow penetrations that are invisible from the living spaces below.
Evaluating Interior Mechanical Systems and Water Lines
Move down into the basement, crawlspace, or utility closet where your primary appliances reside. Record the age, model number, and manufacturer of your major mechanical equipment so you know when items are approaching the end of their typical operating life.
Examine all visible plumbing joints, shut-off valves, and supply lines feeding your sinks, toilets, and major appliances. Pay close attention to flex hoses on washing machines and ice makers, replacing aged rubber lines with braided stainless steel.
Focus on these key checks during your baseline audit:
- Check appliance age tags and log serial numbers.
- Inspect rubber supply hoses on appliances for micro-cracks.
- Verify main water shut-off valve opens and closes smoothly.
- Test all ground-fault circuit interrupter (GFCI) outlets.
During this utility walk, take time to check the base of your hot water tank. Corrosion around the bottom rim or moisture along the fittings can indicate a subtle water heater leak that could suddenly worsen and flood your utility area. Catching this early allows for a scheduled replacement on your terms rather than a frantic midnight cleanup.
Step 2: Preparing Exterior Structures and Irrigation for Spring
When winter frost melts away, your property transitions into a period of rapid thaw and spring rainfall. The goal during these months is to assess winter damage, ensure surface water drains away from your foundation, and safely reactivate outdoor equipment.
Commissioning Outdoor Watering Systems and Perimeter Features
As soil temperatures rise above freezing, attention naturally turns to your landscape and boundary structures. Unwinding winterization measures requires a methodical touch to ensure pressure surges do not damage delicate components.
Slowly open the main valve supplying your outdoor irrigation lines to fill the system gradually. Opening valves too fast creates a water hammer effect that can crack pipe joints or burst valve manifolds. Once pressurized, run through each zone manually to check for misaligned spray heads, sunken pop-ups, or saturated patches of turf that signal an underground line leak. A properly tuned sprinkler system keeps your lawn healthy without wasting thousands of gallons of water or washing out soil near your foundation footings.
Follow this sequence when restarting your irrigation system in the spring:
- Slowly open the main water supply valve to avoid pressure spikes.
- Inspect the backflow preventer for winter freeze cracks.
- Cycle through each zone manually for two to three minutes.
- Adjust misdirected heads away from windows, walkways, and siding.
- Program the controller for deep, infrequent morning watering.
While working around the yard, inspect all property boundary structures that endured winter snowpack and ground movement. Walk the full length of your fencing to verify posts remain plumb and attachment brackets are secure. If you have a vinyl fence, check for cracked bottom rails caused by heavy snowdrifts or impacts from snow shovels. Washing away built-up winter grime with a mild detergent and checking post caps helps maintain the appearance and structural integrity of the material for years to come.
Managing Heavy Spring Rain and Foundation Runoff
Spring storms test your home’s ability to manage surface water. Clear all leaves, twigs, and debris from gutters and downspout runouts. Ensure downspout extensions discharge water at least five to six feet away from foundation walls. If your basement relies on a sump pump, pour a bucket of water into the basin to test the float switch and verify the discharge line carries water safely clear of the house.
Step 3: Enhancing Summer Cooling and Plumbing Line Performance

Summer brings intense heat, high humidity, and increased indoor water use as families spend more time at home. Summer maintenance focuses on keeping your home comfortable while protecting heavy-use plumbing from unexpected backups.
Maintaining Indoor Climate Control Efficiency
When summer heat settles in, your cooling system works continuously to keep living spaces comfortable and manage indoor humidity levels. Neglecting basic filter changes forces equipment to run longer cycles, driving up monthly power bills and putting unnecessary strain on the compressor.
Check air filters monthly during peak summer use, replacing them whenever dust obscures the filter media. Beyond filter changes, keep the outdoor condensing unit clear of weeds, grass clippings, and debris to allow proper airflow across the coils. Gently rinse dirt from the exterior fins with a garden hose, taking care not to bend the delicate metal louvers. Keeping up with basic care for your heating and cooling equipment ensures consistent comfort while avoiding sudden breakdowns during summer heatwaves.
Safeguarding Heavy-Use Drainage and Waste Lines
High-volume summer routines—frequent showers, continuous laundry loads, and heavy kitchen prep—put added demand on your waste lines. Organic material, grease, and hair can collect inside interior branch lines, gradually restricting flow.
- Use hair catchers in all tub and shower drains, cleaning them weekly.
- Avoid pouring cooking oils, fats, or coffee grounds down kitchen sinks.
- Flush garbage disposals with cold water and ice cubes to clear internal impellers.
- Run hot water through sink drains periodically to wash away soft build-up.
Taking time for proactive drain cleaning helps keep waste lines running clear without resorting to harsh chemical products that can damage internal pipe surfaces over time.
Step 4: Fortifying Heating Infrastructure and Masonry in Autumn
Autumn is your crucial preparation window before severe cold weather arrives. The primary objective during fall is sealing the building envelope, checking heating equipment, and servicing fuel-burning appliances before you need them daily.
Preparing Flues, Fireplaces, and Masonry Openings
As temperatures drop, fuel-burning hearths become a centerpiece of home comfort. However, operating a fireplace or wood stove without proper annual preparation introduces significant fire and indoor air quality hazards.
Schedule an annual inspection of your hearth and vent flue before your first fire of the season. A professional sweep removes dangerous creosote build-up, checks for animal nests, and verifies that the damper opens and closes completely. Address any loose mortar, cracked firebricks, or damaged exterior flashing promptly; timely chimney repairs prevent moisture penetration that leads to freeze-thaw masonry damage during winter months.
Servicing Domestic Hot Water Tanks and Heating Components
Your hot water system works harder as cold municipal water enters the home during fall and winter. Over time, naturally occurring minerals settle at the bottom of the storage tank, forming an insulating sediment layer that reduces heating efficiency and causes premature tank failure.
Complete these steps when maintaining your hot water tank each fall:
- Turn off power at the breaker for electric units or set to pilot for gas units.
- Connect a garden hose to the lower drain valve.
- Open a nearby hot water faucet to break the vacuum.
- Drain several gallons into a bucket until water runs clear.
- Close the valve, restore the water supply, and turn the power back on.
If you notice unusual rumbling sounds, erratic water temperatures, or slow recovery times during this process, it may be time to consult a technician for targeted water heater repair. Replacing a failing heating element, flush valve, or worn anode rod can restore peak performance and significantly extend the operating life of your unit.
Step 5: Safeguarding Vulnerable Plumbing During Winter Freezes
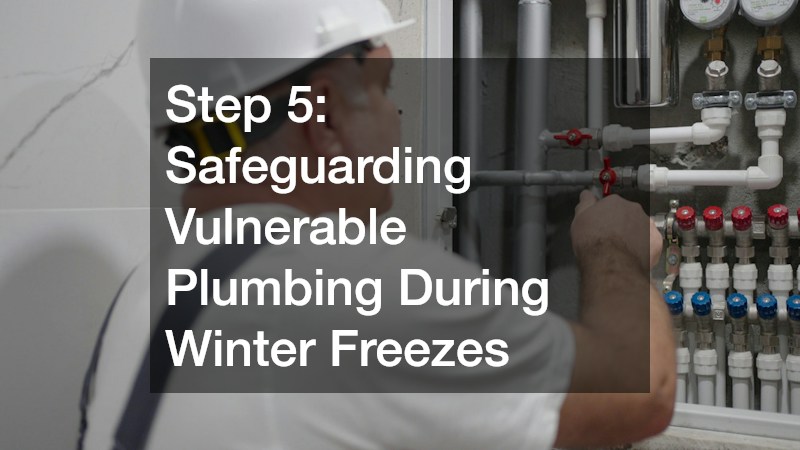
Winter presents unique challenges for homeowners. Sub-zero temperatures, freezing winds, and ice accumulation can quickly damage exposed home systems. Winter maintenance focuses on preventing freeze damage and handling emergency repairs smoothly if issues arise.
Insulating Water Lines and Managing Sub-Zero Threats
When severe cold sets in, standing water inside uninsulated pipes can freeze, expand, and exert extreme pressure on pipe walls. Unconditioned areas like crawlspaces, basements, attics, and exterior walls are particularly vulnerable.
Wrap exposed water lines in unconditioned spaces with pre-slit foam pipe insulation or thermostatically controlled heat tape. Disconnect, drain, and store all outdoor garden hoses before the first freeze, and shut off interior supply valves leading to outdoor spigots. On exceptionally cold nights, leave cabinet doors open under kitchen and bathroom sinks to let warm room air circulate around supply lines.
If an unexpected freeze causes a pipe to rupture, knowing how to act quickly can minimize damage. Knowing the location of your main water shut-off valve and keeping basic tools on hand makes any sudden plumbing repair manageable, stopping water flow before serious structural damage occurs.
Evaluating Aging Infrastructure and Long-Term Pipe Health
Winter often highlights hidden vulnerabilities in aging plumbing systems. Repeated expansion and contraction cycles from temperature fluctuations can cause weak joints, corroded galvanized steel, or brittle copper lines to fail.
Pay attention to minor warning signs during cold months, such as low water pressure at specific fixtures, discolored tap water, or faint ticking sounds inside walls when hot water runs. While minor leaks can often be patched, widespread corrosion or recurring pinholes across multiple branch lines suggest that targeted pipe replacement is a safer long-term investment than temporary fixes.
Step 6: Setting Up a Sustainable Record-Keeping System
A seasonal maintenance checklist is only as effective as the system you use to track it. Without a centralized record, it is easy to forget when you last changed a furnace filter, flushed a tank, or inspected an attic space.
Choose a record-keeping format that fits your daily habits. Some homeowners prefer a simple physical binder with labeled tab dividers for each season, stored near the main electrical panel or utility room. Others prefer digital tools like smartphone calendar reminders, spreadsheet templates, or dedicated home maintenance apps.
Structure your home maintenance records using these core categories:
- Seasonal Checklists: Keep separate files for spring startup, summer upkeep, autumn prep, and winter freeze protection.
- Equipment Records: Maintain folders for appliance manuals, warranty details, and serial number logs.
- Service History: Store receipt archives, contractor invoices, and emergency contact lists in one place.
Whatever format you select, store equipment manuals, warranty documentation, contractor invoices, and service receipts together. Keeping detailed records makes it easy to track service intervals, validate warranty claims, and show prospective buyers that your home has been well cared for when the time comes to sell.
Additionally, build a modest emergency maintenance reserve within your household budget. Setting aside a small monthly amount ensures you can address necessary repairs quickly without disrupting your broader household finances.
Taking Control of Your Home Maintenance Routine

Managing a home does not have to feel overwhelming or chaotic. By breaking home maintenance down into structured seasonal tasks, you convert an intimidating list of chores into manageable, quarterly steps.
Take the first step this week by picking one specific area—such as your utility space or exterior perimeter—and completing a quick baseline audit. Document what you find, add upcoming tasks to your calendar, and build momentum from there. Over time, this proactive approach will save you money, protect your living space, and give you peace of mind knowing your home is well-prepared for any season.